How to take photos for a website banner
Filters
Results
Finding a good image to use for your website can be difficult. A banner image (also known as a “hero” image) is the big picture that you see will see on most website pages. It is usually located at the top, but that is not a hard rule as website designs are becoming more unique and creative. It’s important to get this image right but it’s not as straightforward as uploading a high-quality photo and you’re done. In this blog, we will be talking about how to help you take and choose the right image for your website banner.
Website Banner Sizes and Ratio
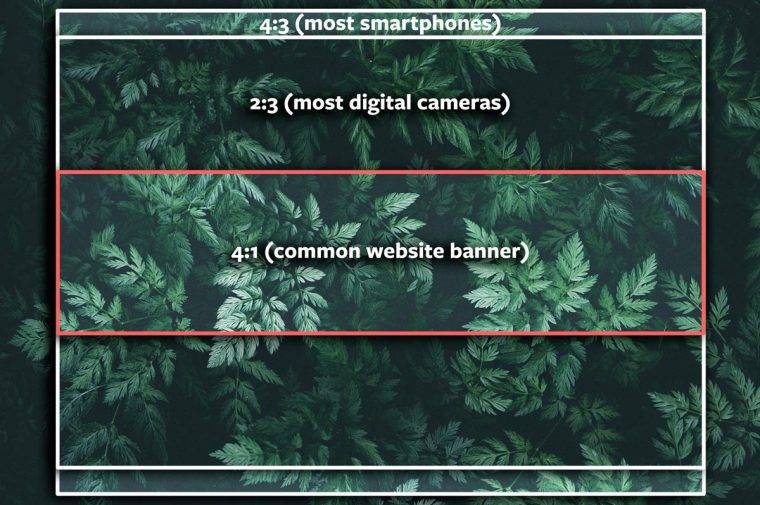
The standard picture ratio that most smartphones take is a 4:3 ratio, and most digital cameras will produce a 3:2 ratio. However, the average website banner is around 4 times as wide as it is tall or a 4:1 ratio. This means that only a small portion of the photograph will be visible when it’s used for the banner image. Below are some tips to help achieve a great looking banner photo.
A good website banner shows your customer that you’re professional and care about your brand. And as a bonus a good banner image can also double as a great cover photo for your business’s social media pages too.
Shoot in landscape
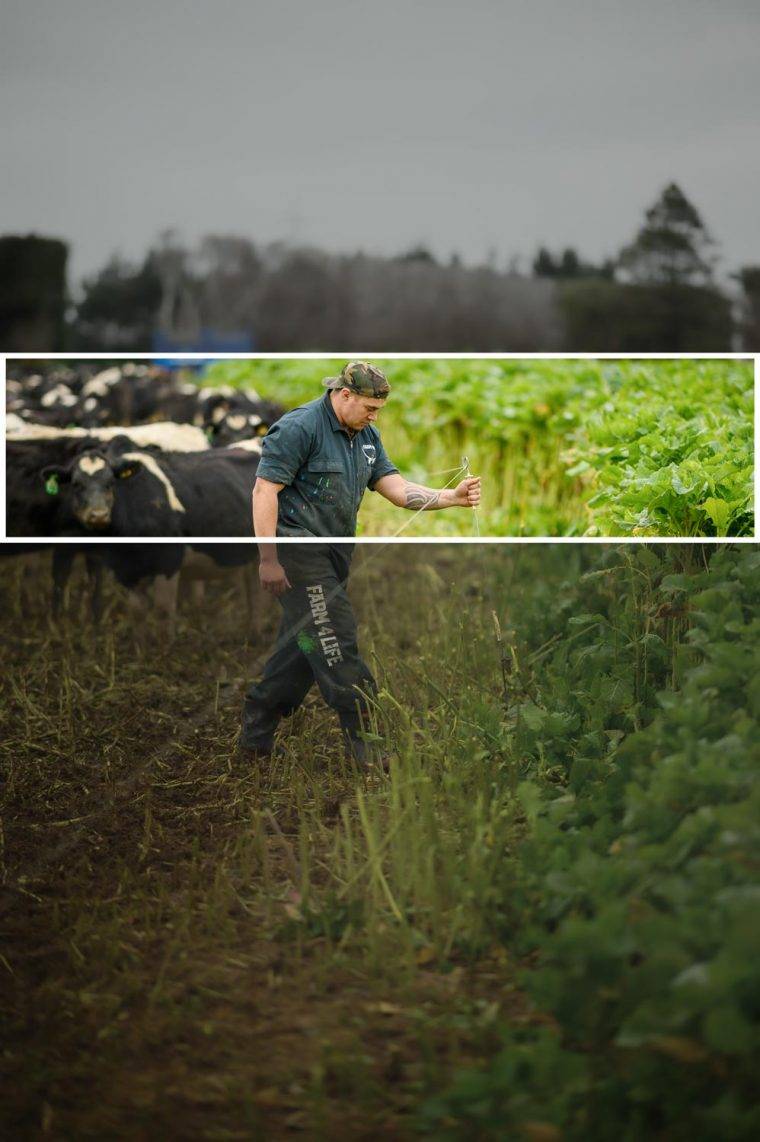
Be sure to only use landscape oriented photos. It is very commonplace to take photos in portrait orientation when using your smartphone, but this can cause a lot of problems if you wanted to use the image for your website. Portrait photos have a much smaller usable area when cropped to banner size. This will result in a massive loss in photo quality, and make the website look very unprofessional. It is also nearly impossible to crop a portrait photo into a banner and make it look good. See the difference of the photo on your phone compared to what visitors will actually see if used as a website banner.
Don’t shoot too close
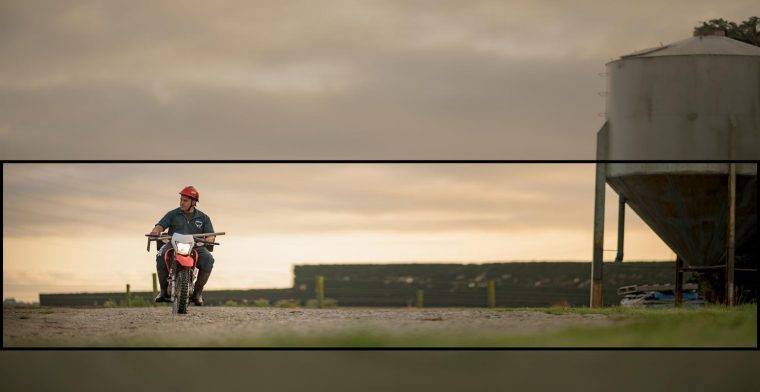
Zooming out and creating more room around the subject is crucial when taking photos for the website banner. Zooming out or moving farther away gives more options for cropping the photo. It is important to allow for different amounts of cropping. A websites banner crop will be different depending on if it is viewed on mobile or desktop, so it is important to allow for both. This means that some photos will have a slightly taller and more narrow picture on some screens and a wider and shorter photo on others. Zooming out fixes this problem by having more negative space in the photo to fill in those areas that might get cropped out. This is a fine balance though, as you don’t want to have to crop the majority of your photo out because you will quickly lose image quality.
Leave room around your subject
This goes hand-in-hand with zooming out, but allowing for space around the subject leaves room more many different composition options. If your photo has a person in it as a subject, but you haven’t captured them entirely or have partially cut them off on the side of the photo, it will mean that they are fixed to that side of the photo and it will limit your options with further cropping. However, if the photo has space all around them, there will be much more room to play with the cropping and composition of the banner image. It will even allow for clear cuts of the subject. Having more options will always end with a better final result.
K.I.S.S. (Keep it simple…)
Simplicity is key in marketing. A photo that has too much going on will often send mixed messages and the viewer will often not understand what you are trying to portray, and will often just look chaotic. Choosing a nice and simple/plain background, or removing unnecessary items in the photo, will draw your viewers eyes to the subject or message much more effectively and more efficiently.

Using negative space for website banner photos
Negative space is referring to a part of an image that does not appear to have a subject or any visual interest. Kind of just empty space. Website banner images are fantastic for using text to quickly convey a message. Creating negative space lets you have room to place text and make it look clean and legible. You do not want to have to place your message over a busy area, or even worse the subject.
Not only is it important to have an open area in the photo, but a shallow depth of field as well. This occurs when the subject is in focus but the background is blurry. A good lens paired with a dedicated digital camera can achieve this reasonably easy, although smartphones have recently learnt wizardry that has allowed them to simulate this look using software. Not only will the shallow depth of field attract your attention to the subject, but the text that is placed in the banner will also pop much more since it won’t be competing with the background of the photograph.

Panoramas
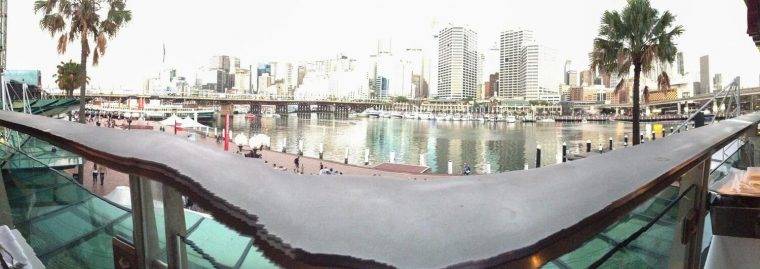
It can be hard to get a great panoramic photo. Moving objects and an unsteady hand can make some really funky and sometimes hilarious results. However, most panoramic photos are already the perfect size for a banner image, require little to no cropping, have more pixels to work with compared to a normal photo and provide a unique look to catch attention. Most smartphones have this feature built into their camera app. But you have to be careful to get it right or you can get some awful looking results. If you take a close look at this intentionally bad photo of our home page that came from panorama mode you can see what can happen.
Getting that perfect website banner
Beautiful, well-executed banner images is a fantastic way to make your website stand out above the competition and really give your business that professional look. Getting the perfect banner image may take more effort and planning than most other photos for your website, unfortunately just using existing photos that you have taken on your phone likely will not yield good results. But spending a little extra time and attention will make a massive difference.
If you are thinking of hiring a professional photographer to take these photos for you, it does pay to make sure that they have worked in the commercial space before as this kind of photography does require a different approach than many other disciplines. This can also give you unique, custom photos to encourage visitors to choose you. You can find out more about how professional photos can help and when and when not to use stock imagery in our article Stock vs Original Photos: Can you see the difference?


